#
CSS for Page Layout
This tutorial explains to you how we can place things into HTML pages using CSS and how we can organize HTML page using CSS.
Here we have an example :
<style>
div.container {
    width: 100%;
    border: 1px solid gray;
}

header, footer {
    padding: 5px;
    color: #b3ffe6;
    background-color: green;
    clear: left;
    text-align: center;
}

nav {
    float: left;
    max-width: 200px;
    margin: 1;
    padding: 1em;
    border-right: 1px solid gray;
    border-bottom: 1px solid gray;
}

nav ul {
    list-style-type: none;
    padding: 0;
}

.selected{
    list-style-type: none;
    color: #ff4dd2;
    padding: 0;
}
nav ul a {
    text-decoration: none;
    color: #a64dff;
}

information {
    margin-left: 199px;
    padding: 1em;
    overflow: hidden;
}

information p{
    margin: 5px 5px 5px 5px;
}
</style>

<div class="container">

<header>
   <h1>Sales Details</h1>
</header>

<nav>
  <ul>
    <li><a class="selected">London</a></li>
    <li><a href="#">Paris</a></li>
    <li><a href="#">Tokyo</a></li>
  </ul>
</nav>

<information>
  <h1>London</h1>
  <p>We have different informations here. 1</p>
  <p>We have different informations here. 2</p>
</information>

<footer>Toys Factory</footer>

</div>
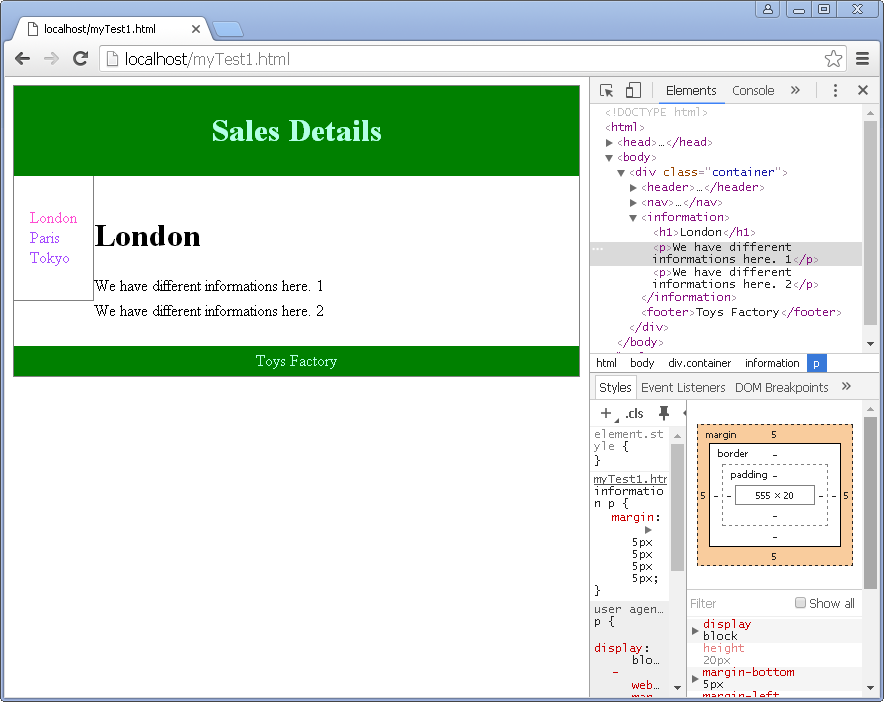
Here is the result :

Things to underline:
Google Chrome (but not only) has a tool (Developer Tools - Ctrl + Shift + I) which shows you how your CSS code impact your HTML page. Take a look at the picture above.
.selectedis a class. You set properties for a class. You have to useclass="selected"Instead dot (.) you can use #. This a property for a specific ID element. This element must have an id="" for using these properties.
Without . or # you specify properties for tags. Take a look at my example.

