#
Create a simple Pipeline
This tutorial explains to you how to create a simple pipeline in Jenkins.
Let's create one job named "Job1" following the instructions from Create a Simple Job in Jenkins. The message for "Job1" will be changed to be "This is Job1".
In the same manner we will create another 2 Jobs: Job2 and Job3. The messages will be changed accordingly.
Following the logic from Run a Job after another Job, we will make Job2 run after Job1 and Job3 run after Job2.
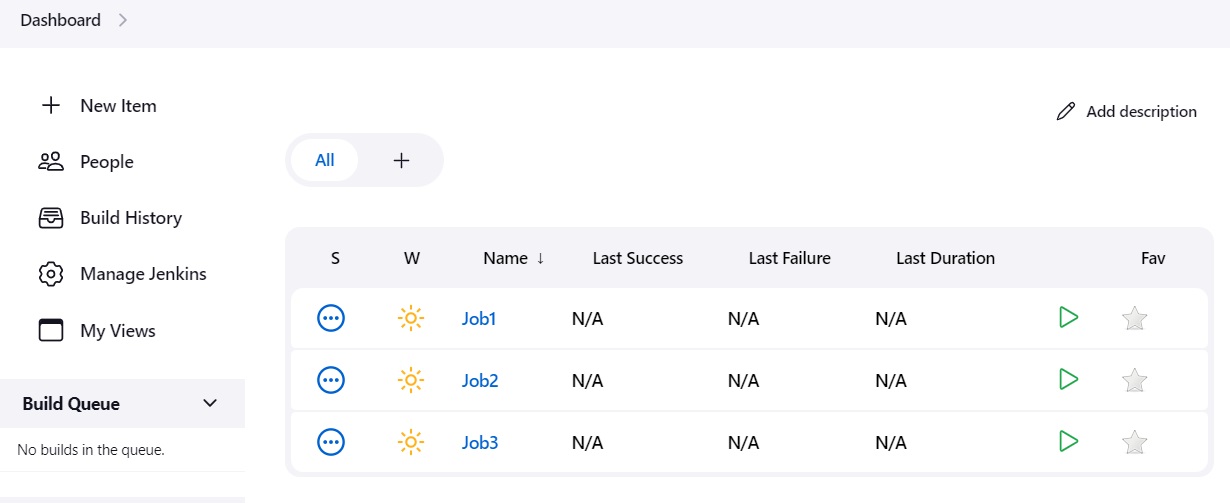
In the Dashboard, we will the 3 jobs:

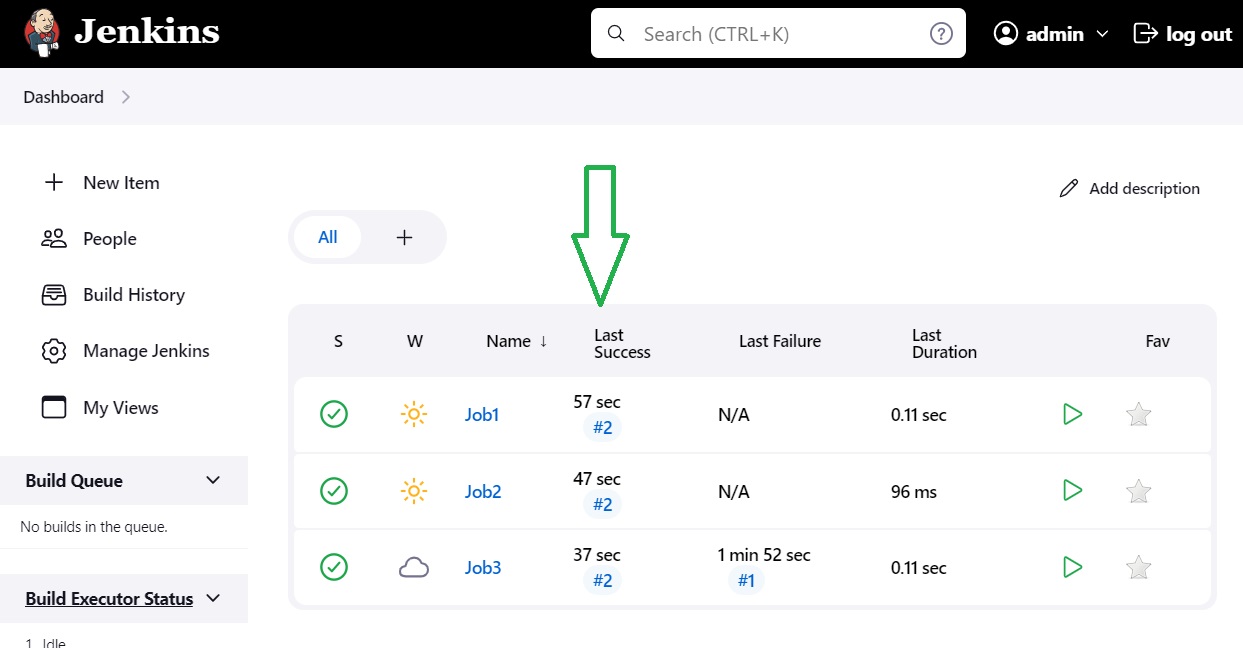
If we run the first job we will see that The jobs are running in the following order: Job1, Job2, Job3. This is our first pipeline !
Now we can investigate and see that the jobs are running in this order.

For instance, the "Last Success" and "Last Duration" columns could show you the order in which the jobs run. Also, if you take a look to the console of each job, you can see something similar to :
Started by user admin
Running as SYSTEM
[EnvInject] - Loading node environment variables.
Building in workspace C:\ProgramData\Jenkins\.jenkins\workspace\Job1
[Job1] $ cmd /c call C:\WINDOWS\TEMP\jenkins12999678578581421642.bat

C:\ProgramData\Jenkins\.jenkins\workspace\Job1>echo "This is Job1"
"This is Job1"

C:\ProgramData\Jenkins\.jenkins\workspace\Job1>exit 0
Triggering a new build of Job2
Finished: SUCCESS
or
Started by upstream project "Job1" build number 2
originally caused by:
 Started by user admin
Running as SYSTEM
[EnvInject] - Loading node environment variables.
Building in workspace C:\ProgramData\Jenkins\.jenkins\workspace\Job2
[Job2] $ cmd /c call C:\WINDOWS\TEMP\jenkins17390199685005883164.bat

C:\ProgramData\Jenkins\.jenkins\workspace\Job2>echo "This is Job2"
"This is Job2"

C:\ProgramData\Jenkins\.jenkins\workspace\Job2>exit 0
Triggering a new build of Job3
Finished: SUCCESS
So, you can debug the order of the jobs, but we prefer to have a visual representation of this workflow (pipeline).
For this happens we can use Jenkins plugins like "Delivery Pipeline" or "Build Pipeline".

